

 19:11
19:11
 Saran Underage

PhotoScape Tutorial - ⋆
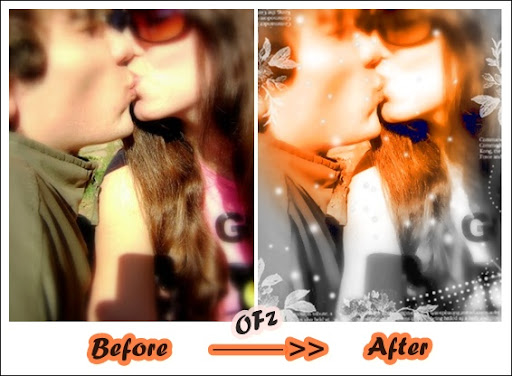
Awesome Effect
Result:
 Material required:-
Material required:-
http://i48.tinypic.com/6zmsrb.
Procedure:-
Open the picture in editor.
Step-1
Turn it to black n white.
step-2
Then, Bright.Color>Colorize.
Saturation level>255
Level>100%
Step-3
Filter>Region Out Of focus>Choose 'grayscale' in 'radial form'
Size>66%
Feather>50%
Then OK (or Apply)
Step-4
Then,apply the texture on it n combine ur photo with object. (Or Material link which given in previous post)
Filter>Smart blur(clear skin)
Picture is Ready \M/
Result:
Material required:-
Material required:-
http://i48.tinypic.com/6zmsrb.
Procedure:-
Open the picture in editor.
Step-1
Turn it to black n white.
step-2
Then, Bright.Color>Colorize.
Saturation level>255
Level>100%
Step-3
Filter>Region Out Of focus>Choose 'grayscale' in 'radial form'
Size>66%
Feather>50%
Then OK (or Apply)
Step-4
Then,apply the texture on it n combine ur photo with object. (Or Material link which given in previous post)
Filter>Smart blur(clear skin)
Picture is Ready \M/
 Posted in: Photoscape Tutorials
0 comments:
Post a Comment